
As temperatures drop and winter approaches, preparing your home for cold weather can help you stay comfortable, control energy costs, and avoid unexpected repairs. From checking insulation and heating equipment to inspecting your roof and gutters, a little preventive maintenance can make a significant difference when freezing temperatures arrive. Completing these tasks before the first major snowfall also gives you more time to schedule professional services and address problems before they become emergencies. By following a thorough pre-winter checklist, you can protect your property, improve energy efficiency, and enjoy greater peace of mind throughout the colder months.
How to Choose the Right Local Insulation Company

Assessing Credentials and Experience
Proper insulation helps maintain indoor temperatures by reducing heat transfer between your home and the outdoors. Before winter, consider whether your attic, walls, crawl spaces, and basement need additional insulation. Choosing a qualified local insulation company can help you identify weak spots and determine the most appropriate solutions for your property.
Look for contractors with relevant training, appropriate licensing where required, and experience working with homes similar to yours. Ask how they evaluate existing insulation and whether their recommendations account for air leakage, ventilation, and moisture concerns. A thorough assessment should identify underlying problems rather than simply recommend adding more material.
Comparing Quotes and Services
Request written estimates from several contractors to understand the scope and cost of the proposed work. Compare the insulation materials, estimated R-values, preparation requirements, labor costs, and cleanup services included in each quote. The lowest price may not provide the best long-term value if the contractor overlooks air leaks or recommends an unsuitable product.
Checking References and Reviews
Read customer reviews and ask for references from previous projects. Look for consistent feedback about communication, punctuality, workmanship, and how the contractor handles concerns after installation. Ask whether the company has experience insulating older homes or addressing cold rooms and uneven temperatures.
Understanding Insulation Options Provided
Different areas of a home may benefit from different insulation materials. Fiberglass, cellulose, and spray foam each offer distinct advantages, depending on the building’s construction and the homeowner’s goals. A knowledgeable contractor should explain these differences and recommend materials based on performance, budget, and moisture conditions.
Importance of Warranties and Post-Installation Support
Before signing an agreement, ask about workmanship warranties, product warranties, and follow-up inspections. Understand which problems are covered and how to request service if the insulation does not perform as expected. Keeping your estimate, contract, and installation records will make future maintenance easier.
What to Consider for Furnace Installation?
Types of Furnaces Available
A dependable heating system is essential when outdoor temperatures remain below freezing. If your furnace or is aging, requires frequent repairs, or struggles to heat your home evenly, replacing it before winter may prevent an inconvenient breakdown.
Natural gas furnaces are common in areas with access to gas service, while electric furnaces can be an option for properties without gas connections. Propane and oil systems may also be suitable depending on local fuel availability and existing equipment. Each option has different operating costs, maintenance requirements, and installation considerations.
Evaluating Energy Efficiency
When comparing furnaces, examine the annual fuel utilization efficiency rating, commonly called AFUE. This rating indicates how much of the fuel a furnace converts into useful heat over a typical operating season. A higher rating generally means less fuel is wasted, although actual savings depend on energy prices, climate, equipment sizing, and household heating habits.
An appropriately sized furnace is just as important as its efficiency rating. Oversized equipment may cycle on and off too frequently, while an undersized system may struggle to maintain comfortable temperatures during extreme cold.
Preparing Your Home for Installation
Before the installation appointment, clear the area around the existing furnace and provide convenient access to the equipment. Remove stored items near the work area, secure pets, and discuss any concerns about existing ductwork, electrical connections, fuel lines, or venting.
Cost and Financing Options
The total price depends on the furnace type, equipment size, installation complexity, and any necessary ductwork or venting upgrades. Request an itemized estimate and ask whether removal of the old equipment, permits, and startup testing are included. Financing may spread the cost over time, but compare interest rates and fees before committing.
Professional Versus DIY Installation
Professional furnace installation is generally the safest approach because the work may involve fuel connections, combustion venting, electrical components, and carbon monoxide risks. Improper installation can create serious safety hazards and reduce efficiency. A qualified technician can verify safe operation and ensure the system meets applicable requirements.
Spray Foam Insulation: Is It Worth It?

Benefits of Spray Foam Insulation
Air leaks around rim joists, attic openings, and wall penetrations can make a home difficult to heat. Spray foam insulation expands to fill gaps and can provide both insulation and air sealing, depending on the product and application. This can reduce drafts and help maintain more consistent indoor temperatures.
Open-cell and closed-cell products have different properties. Open-cell foam is generally lighter and more flexible, while closed-cell foam provides greater insulation per inch and can offer additional resistance to moisture movement. Neither should be selected without considering the location, building assembly, and ventilation requirements.
Comparing With Other Insulation Types
Unlike traditional batts, spray foam can conform to irregular spaces and seal many small openings. However, fiberglass and cellulose may cost less and can be suitable for accessible cavities with straightforward dimensions. The right choice depends on the project’s priorities rather than the assumption that one material is always superior.
Installation Process Overview
Installers typically assess the area, prepare surrounding surfaces, and protect nearby materials before applying the foam. Because the chemicals and application process require appropriate precautions, occupants may need to leave the work area or home for a period determined by the product instructions and contractor’s safety guidance.
Cost Considerations
Spray foam usually costs more upfront than many conventional insulation materials. The price varies with foam type, thickness, access, and the size of the area being insulated. Ask for a detailed estimate that specifies the material and coverage.
Long-Term Energy Savings
By reducing air leakage and heat loss, properly installed foam may lower heating costs and improve comfort. Actual savings vary according to the home’s existing insulation, air-sealing quality, and heating system. Before proceeding, ensure the project will not block necessary ventilation or trap moisture in building materials.
How Effective Is Fiberglass Batt Insulation?
Advantages and Disadvantages
Fiberglass batt insulation remains a practical choice for many homes because it is widely available and generally affordable. The preformed sections fit between standard wall studs, floor joists, and roof framing, making them useful for projects with accessible cavities.
However, batts perform poorly when compressed, left with gaps, or installed around obstructions without proper fitting. They also do not inherently provide the same level of air sealing as dedicated air-barrier materials. Drafts may persist if leaks around windows, wiring, plumbing, and framing are not addressed separately.
Installation Best Practices
Batts should fit snugly within their intended cavities without being compressed or folded. Installers must account for electrical wiring, pipes, and other obstructions to maintain consistent coverage. In cold climates, the correct vapor-control strategy depends on local code and the construction of the wall or ceiling.
Comparing Thermal Resistance
Insulation performance is measured by R-value, which describes resistance to heat flow. The appropriate R-value depends on the home’s climate zone and the location being insulated. Attics generally require different insulation levels than walls, so follow applicable energy codes and professional recommendations rather than relying on a single target for the entire home.
Impact on Indoor Air Quality
Fiberglass insulation should remain enclosed behind suitable building materials to limit the release of irritating fibers into occupied spaces. During installation, workers should use appropriate protective equipment. Homeowners should also investigate existing moisture damage before adding insulation, since damp materials and concealed leaks can contribute to indoor air quality problems.
Comparing Costs With Other Insulations
Fiberglass is often less expensive than spray foam, particularly in open framing or easily accessible areas. Nevertheless, the overall project cost should include air sealing, installation labor, and any repairs required before the insulation is installed. A lower material price does not necessarily translate into better performance if the work is incomplete.
Which HVAC Companies Offer the Best Winter Prep Services?
Key Services to Look For
Before winter, arrange an inspection of your heating equipment and related components. Reputable HVAC companies can clean equipment, inspect burners and heat exchangers where applicable, check electrical connections, replace filters, evaluate airflow, and test system controls. They can also identify warning signs that warrant repairs before temperatures fall further.
Evaluating Customer Service
Choose a company that explains its findings clearly and provides written recommendations. Technicians should answer questions without pressuring you into unnecessary replacements. Ask whether emergency service is available during severe winter weather and whether additional fees apply to after-hours appointments.
Reputation and Reliability
Check reviews, references, insurance coverage, and relevant licensing requirements. Look for a consistent record of safe work, reliable scheduling, and transparent pricing. A contractor who documents maintenance findings can also help you track recurring issues from one season to the next.
Price Versus Service Quality
Compare estimates based on the actual services included, not just the advertised maintenance price. A thorough inspection may cost more than a basic tune-up but could identify airflow problems or worn components that otherwise lead to a breakdown. Request approval before any additional repairs are performed.
Long-Term Relationship Building
Working with the same trusted provider can simplify annual maintenance and equipment planning. Keep records of service visits, repairs, filter changes, and equipment warranties so technicians can make informed recommendations during future appointments.
Are Mini Split Installations a Good Option for Winter?
Understanding Mini Split Systems
Ductless mini split installations are useful because they use an outdoor unit connected to one or more indoor units to heat or cool specific areas. Because they do not require conventional ductwork, they can be useful for additions, converted garages, finished basements, and older homes with limited space for ducts.
Benefits During Winter
Many modern mini-splits operate as heat pumps, moving heat from outdoor air into the home. Cold-climate models can provide effective heating at low outdoor temperatures, although performance and capacity vary by equipment. Check the manufacturer’s published specifications for the temperatures your area experiences.
Zoned heating allows homeowners to control different rooms independently, potentially reducing energy use when certain areas are unoccupied. However, a mini-split may not replace a whole-house heating system unless it is designed and sized to meet the property’s needs.
Cost-Benefit Analysis
The initial cost depends on the number of indoor units, equipment capacity, electrical work, and installation complexity. Operating savings depend on local electricity and fuel prices, existing heating efficiency, and how the system is used. Compare expected performance with your current heating system before making a decision.
Installation Requirements
A professional installer should evaluate room sizes, insulation levels, window exposure, electrical capacity, and appropriate outdoor-unit placement. The outdoor unit needs sufficient clearance for airflow and snow removal. Refrigerant lines, condensate drainage, and electrical connections must be installed according to manufacturer instructions and applicable codes.
Maintenance and Care Tips
Clean indoor filters as recommended, keep outdoor coils clear of leaves and snow, and check that drainage pathways remain unobstructed. Schedule professional service when performance declines or unusual noises develop. During heavy snowfall, avoid piling snow against the outdoor unit or blocking its airflow.
What to Expect From an HVAC Installation?
Step-by-Step Installation Process
A new heating or cooling system should begin with an assessment of the home’s heating and cooling loads. The contractor then recommends suitable equipment, reviews the scope of work, and plans any necessary ductwork, electrical, or ventilation modifications.
During hvac installation, technicians remove old equipment when necessary, position the new components, complete the required connections, and configure system controls. They should then test the equipment and verify safe operation before handing the system over to the homeowner.
Timeline and Scheduling
Straightforward replacements may be completed in a day, while projects involving ductwork changes or substantial electrical modifications can take longer. Schedule work well before the coldest weather arrives, allowing time to resolve unexpected issues or equipment delays.
Cost Factors and Budgeting
Equipment type, system capacity, efficiency, labor, and installation complexity all influence the final cost. Obtain a written proposal identifying included work and potential additional charges. Consider long-term operating expenses alongside the initial purchase price.
Energy Efficiency Considerations
Ask whether the new equipment is appropriately sized and compatible with your existing distribution system. Sealing duct leaks, correcting airflow restrictions, and improving insulation can help a new system perform as intended. High-efficiency equipment cannot fully compensate for substantial heat loss elsewhere in the home.
Post-Installation Inspection and Testing
Before the contractor leaves, confirm that the system starts correctly, responds to thermostat settings, and distributes heat as expected. Request operating instructions, maintenance recommendations, and warranty documentation. Make sure you understand when filters need replacement and whom to contact if a problem develops.
How to Inspect and Repair Gutters Before Winter?
Tools and Materials Needed
Inspect gutters during dry weather using a stable ladder placed on firm ground. Gloves, a scoop, a garden hose, and basic hand tools may help with cleaning and minor repairs. Never climb onto an icy roof or attempt ladder work in windy conditions.
Identifying Common Issues
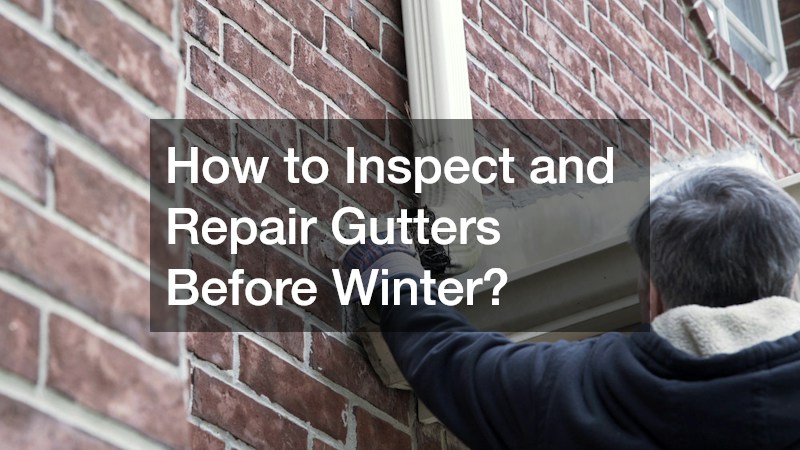
Look for leaves, twigs, loose brackets, separated joints, sagging sections, and signs of rust or cracking. Water stains beneath the roofline may indicate overflow or leakage. Check downspouts for obstructions and ensure discharge is directed away from the foundation.
Step-by-Step Repair Guide
Begin by removing debris and flushing the gutters with water. Tighten loose fasteners, replace damaged seals where appropriate, and correct minor alignment problems. Severely corroded sections, unstable attachments, and gutters positioned high above the ground may require professional attention.
Importance of Cleaning and Maintenance
Clean gutters allow rainwater and melting snow to drain properly. Blockages can contribute to overflow, foundation moisture, and ice buildup along the roof edge. In freezing climates, these problems may increase the risk of ice dams, particularly when attic heat loss melts snow on the roof.
Costs Involved
Costs depend on gutter length, height, material, accessibility, and the extent of the damage. Minor repairs may be relatively inexpensive, while replacement of extensive sections can cost considerably more. Addressing small problems before winter can help prevent water damage and more expensive repairs.
When to Hire Local Roofing Contractors?
Signs Your Roof Needs Attention
Inspect your roof from the ground for missing, curled, or damaged shingles, sagging areas, and deteriorating flashing. Look inside the attic for water stains, damp insulation, or daylight visible through the roof structure. Leaks should be investigated promptly, even when they appear small.
Tips for Choosing the Right Contractor
When repairs exceed your experience or require working at height, contact qualified local roofing contractors. Check references, insurance, licensing where required, and experience with your roofing material. Ask for a written description of the work and an estimated completion schedule.
Understanding Roofing Estimates
A roofing estimate should identify the affected areas, proposed repairs, materials, labor, and disposal costs where applicable. Clarify whether the contractor will inspect underlying decking and how additional damage will be priced. Comparing detailed estimates helps you distinguish meaningful differences in scope from simple price variations.
Warranty and Insurance Aspects
Ask whether materials and workmanship carry separate warranties and what conditions could limit coverage. Confirm that the contractor maintains appropriate insurance, and review your own policy before assuming that storm damage or gradual deterioration will be covered.
Seasonal Timing and Scheduling
Arrange repairs before heavy snow and persistent freezing temperatures make roof work more difficult. Weather conditions can affect material installation and scheduling, so avoid delaying urgent leak repairs. If replacement is necessary, discuss the manufacturer’s temperature requirements and the contractor’s plan for working safely.
How to Implement an Effective Moisture Control Service?
Identifying Moisture Problems
Winter preparation should include looking for signs of excess moisture throughout the home. Condensation on windows, musty odors, peeling paint, damp basement walls, and recurring mold growth may indicate inadequate ventilation, plumbing leaks, or water intrusion.
Solutions for Moisture Control
An effective moisture control service may include identifying the source of water, improving drainage, sealing appropriate air leaks, and evaluating ventilation. In basements and crawl spaces, solutions might involve repairing foundation leaks, managing groundwater, or installing a properly designed vapor barrier.
Bathrooms and kitchens should have suitable exhaust ventilation, while clothes dryers must vent outdoors through an appropriate system. Dehumidifiers may help in certain damp spaces, but they cannot replace repairs to leaks or other underlying moisture sources.
Impact on Home Energy Efficiency
Moisture management supports building durability and can improve comfort. Damp insulation may lose effectiveness, while persistent water intrusion can damage framing and finishes. Controlling humidity and preventing leaks also helps protect indoor air quality throughout the heating season.
Consulting With Experts
If moisture problems persist, consult a qualified building professional to determine their cause. The right solution may require coordination among insulation specialists, plumbers, roofers, or ventilation contractors. Avoid covering damp materials with new insulation or finishes before the source of moisture has been resolved.
Maintenance Tips and Long-Term Strategies
Check plumbing connections, roof penetrations, basement walls, and window seals periodically. Keep gutters clear, maintain appropriate indoor humidity, and make sure ventilation equipment operates correctly. After heavy rain or snowmelt, inspect vulnerable areas for signs of water entry.
Closing Thoughts
Preparing your home for winter involves more than turning up the thermostat when temperatures fall. Insulation improvements, heating system maintenance, and timely roof and gutter repairs can help prevent costly problems while improving comfort and energy efficiency. Addressing moisture concerns is equally important because hidden leaks and damp building materials can undermine other improvements.
Start with a careful inspection of your property, identify urgent repairs, and schedule qualified professionals well before severe weather arrives. By planning ahead, comparing estimates, and maintaining your home’s essential systems, you can enter winter with greater confidence and enjoy a warmer, safer living environment throughout the season.